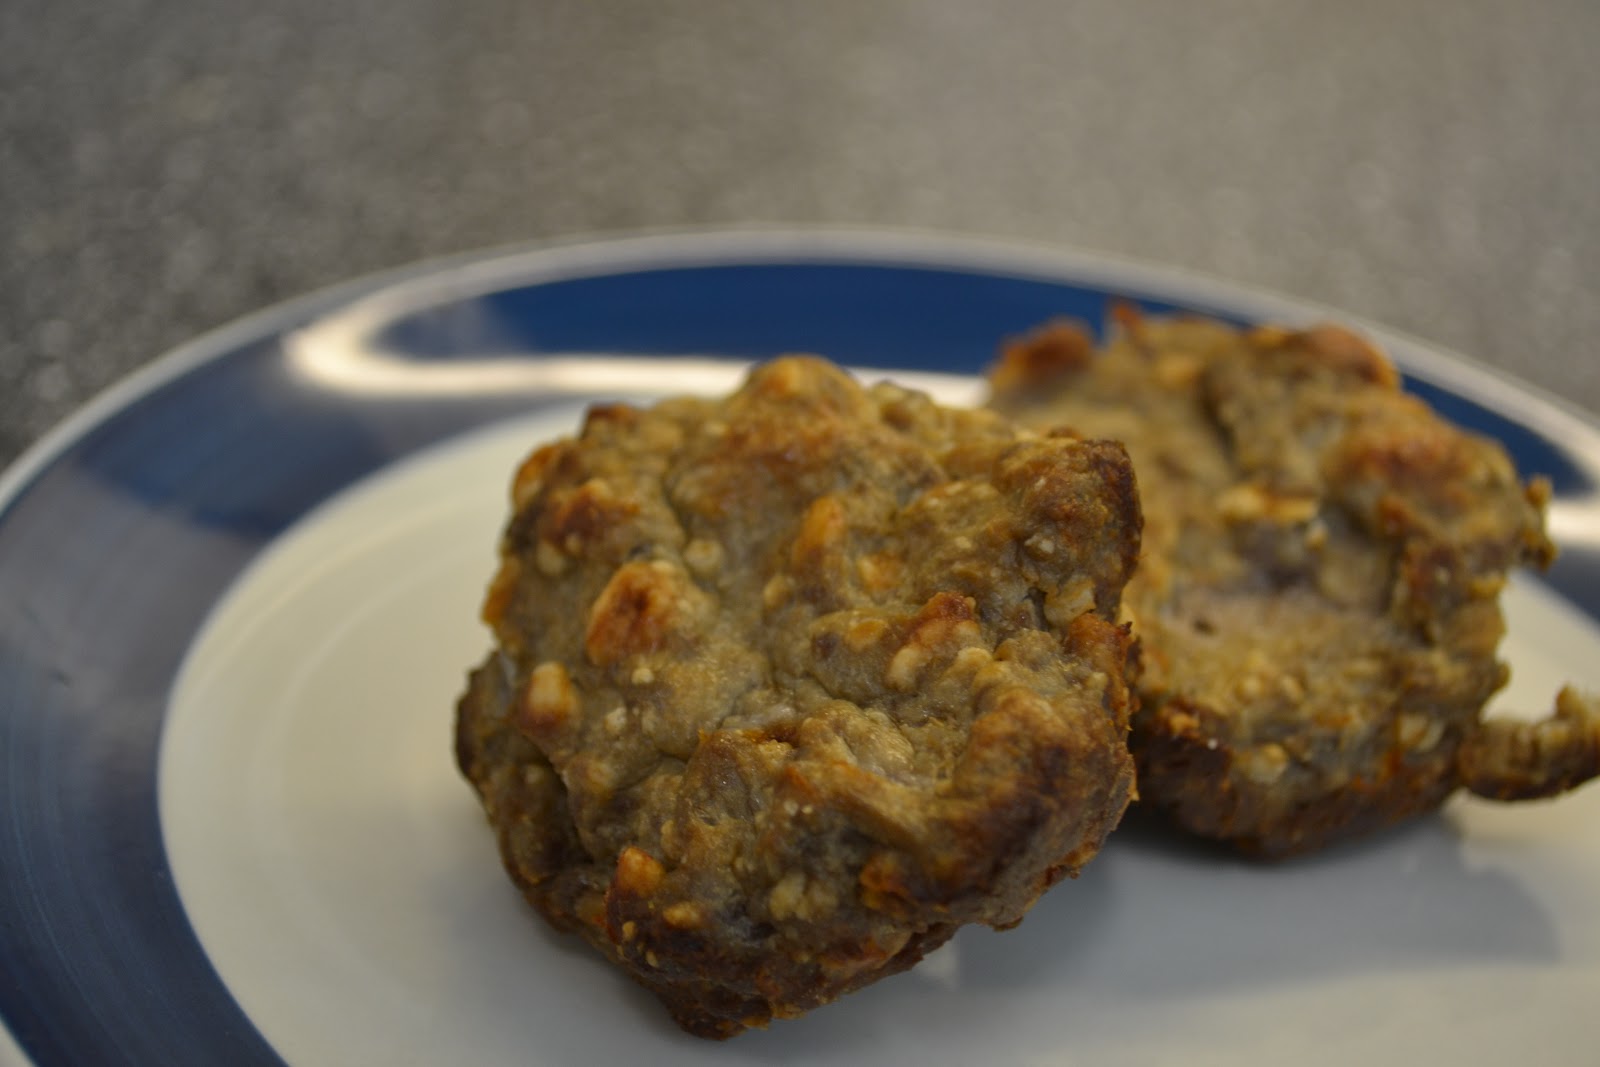
Showing posts with label Supper. Show all posts

January 9, 2015

Photo Friday

Day 3: Outside. IT SNOWED HERE! We woke up Saturday morning to a little snow. By the time we left to run errands around 9, most of it had melted, but there was snow on the ground! Pictures or it didn't happen, right?!

 Day 4: Four. Last weekend, Josh and I were organizing Cole's room and came across a bunch of Josh's old Hot Wheels. Cole has been in hog heaven ever since. He loves racing them around his road rug! I think Josh likes racing cars on the road rug too! Boys. :)

 Day 5: Great song. Have you ever been hanging out listening to music, and you just have to have a dance party?! This is an everyday occurrence at our house. Our current favorite dancin' tune is
"Uptown Funk." We especially love using cars as microphones to sing along.

Day 6: New. We upgraded our Kia! I will miss my Kia Soul. I loved that little car, but that's exactly what it was-little. With baby number 2 on the way, Josh and I decided it was time for a "grown up" car. It even has heated seats, fancy!
Day 7: Makes me smile. I really wanted to grab the nice camera for this, but I absolutely did not want to wake him up! Sometimes my son sleeps with his hand under his armpit, other times I find him with his hand down his pants. Must be a boy thing!
 Day 8: Recipe. We've had this tasty supper a few times now, and every time, I'm surprised by how easy and filling it is. To simplify things, I use Oscar Mayer carving board turkey or chicken (we've tried both, be sure to buy 2 of the 7.5oz. containers). I've also used Hungry Jack mashed potatoes if we don't have leftover mashed potatoes.
 
 Day 9: Paper. Does cardboard count as paper? I think so. I also think Amazon would make a killing just selling their big boxes. Cole sat and colored in this box for almost 30 minutes. THIRTY MINUTES! He won't color on paper for more than 30 seconds, but he stayed busy for an entire television show! Why didn't I think of this before?!

January 5, 2015

Simple Sausage Skillet Supper

How have I not shared this recipe?! We've been chowing down on this awesome Trout supper staple for almost 2 years, and I guess I was being a bit of a hoarder about it-sorry! I found this recipe from Kitchen Monki while scrolling through Pinterest a while back, and made a few adjustments to fit our family.


If I have it on hand, I'll add the onion and zucchini as instructed in the original recipe, but if not, it tastes great without. Seriously, try this recipe out, it's easy, filling, and tastes great!

February 2, 2014

My Birthday Part 2

I like to pretend my birthday is something to celebrate for at least a week, which it is. This year, it took almost my whole birthday week to do everything I had hoped to accomplish in one day. My birthday supper, for example, was supposed to be spicy Italian beef, with an angel food cake for dessert. Neither of those happened on the 27th. After my spa day was over and Cole was fast asleep, this birthday girl had a small marathon of Supernatural (Josh got me the first 8 seasons on DVD!).

Honestly, I don't know what possessed me to try this spicy Italian beef recipe, I really don't care for spicy food. In any case, it wasn't too spicy (my husband will say it isn't spicy enough when I make it for him, once he gets back). If you are an adventurous eater, this recipe might be right up your alley:

^This photo is a bit of a lie, I added the pepperoncini for a more interesting photo, those suckers did NOT stay on my sandwich for long. Sorry for the deceit, friends.

This recipe comes from the Crock-Pot recipe collection
Spicy Italian Beef
Ingredients:
1 boneless beef chuck roast (3-4 pounds)
1 jar (12oz.) pepperoncini
1 can (14 1/2 oz) beef broth
1 1/2 cups water (or beer)
1 onion, minced
2 tablespoons dried Italian seasoning
1 loaf French bread, cut into thick slices
provolone cheese (optional)

Trim any fat from beef and discard. Place chuck roast in crock-pot. Drain and pull off stem ends of pepperoncini. Add pepperoncini, broth, water/beer, onion and herb blend to crock. Do NOT stir. Cover and cook on low for 8-10 hours. Remove beef, shred and return to cooking liquid; mix well. Serve on French bread.

I think this would also be tasty on rice, if French bread isn't appealing to you.


I wanted to have a birthday cake that Cole could enjoy too, and I found out angel food cake is naturally dairy-free. Unfortunately, Cole couldn't have cared less about the cake. He was more interested in the strawberry sauce and "whipped cream" I served with my cake.

This recipe comes from About.com
Angel Food Cake:
12 large egg whites (or about 1 1/2 cups)
1 1/4 cup confectioners' sugar
1 cup all purpose flour
2 t. vanilla extract
1 t. cream of tartar
1/4 t. salt
1 cup sugar
Strawberry sauce (recipe below)
Dairy-free "whipped cream" (recipe below)

Preheat the oven to 350 F. Place the egg whites in a large mixing bowl, and let stand at room temperature for 30 minutes. Meanwhile, sift together the confectioners' sugar in a medium-sized bowl until well combined. Set aside.

Add the vanilla extract, cream of tartar and salt to the egg whites. Using an electric hand mixer, beat the egg whites mixture on slow speed for 2 minutes. Turn up the speed to a medium speed setting and begin gradually adding the sugar, beating continuously until the sugar is dissolved and stiff peaks form. Turn off the mixer, and using a spatula, slowly fold in the flour-confectioners' sugar mixture into the egg whites.
Gently spoon the batter into an ungreased 10-inch tube pan. Bake for 35-45 minutes, or until the cake springs back when touched or a toothpick inserted into the center of the cake (between the outer wall and the inner wall of the pan) emerges clean. Invert the cake pan onto a cooling rack and allow the cake to cool for at least 1 hour before removing the cake from the pan.

Strawberry Sauce:
3 cups strawberries, chopped (I used frozen strawberries that I thawed slightly)
3/4 cup sugar
1 tsp. lime juice

In a medium saucepan, combine everything and bring to a boil over medium heat, stirring frequently. Once it begins to boil, reduce heat and simmer for 5 minutes, still stirring frequently. Remove from heat and serve warm or cold.

Dairy-free "Whipped Cream"
1 can of coconut milk
vanilla
cinnamon

Chill coconut milk overnight. Spoon (not pour) coconut cream into bowl, add desired amount of vanilla and cinnamon and whip. Voila!

Tip: To know if it's a good coconut milk to use for whipped cream, rattle the can, if you hear nothing, add it to your cart. If you hear liquid sloshing around, it won't work for whipping. Also, now that I've told you to give the can a shake, before you place it in the fridge and after it's spent the night there, do not shake it. Basically, once it's in your home, leave it alone. Otherwise the cream combines with the coconut water and isn't worth whipping.


I could end this post another activity from my birthday week, instead I will leave you with this little nugget of information:


January 12, 2014

Baked Tilapia


I've never cooked real fish before. I've made fish patty sandwiches and fish sticks, but never prepared and cooked a fish on my own. When Cole and I went to the commissary last week, I decided on a whim to buy frozen tilapia. I am so surprised at how well it turned out (even though I forgot to thaw it, but more on that in a second). Pinterest gave me a few ideas, isn't Pinterest the best?!

Thanks to yummly.com for this tasty recipe. I slightly adapted this recipe to our preferences.

Baked Tilapia
Ingredients:
2 tilapia fillets, thawed
3-4 tablespoons olive oil
4 tablespoons lemon juice
1/2 tablespoon garlic powder
1/2 teaspoon oregano
1/4 teaspoon paprika
salt and pepper to taste

Preheat oven to 425 degrees. Place tilapia in 8"x8" glass baking dish. In a small bowl, combine the rest of the ingredients. Pour mixture over fillets. Bake 10-15 minutes, or until fish is white and flaky.

If you're like me and didn't thaw ahead of time, fear not. I placed the fillets in a bowl and ran cold water on them until they had thawed a bit (about 10 minutes), they weren't completely thawed when I completed the rest of the recipe, but I was too hungry to wait any longer. I kept an eye on my fish and baked it maybe 3 or 4 minutes longer and it turned out just fine.

Steamed/ Sauteed Seasoned Veggies
Ingredients:
2 cups frozen carrots, cauliflower, and broccoli (these were the perfect size for Cole without having to cut them down any further)
Olive oil
Garlic powder
Onion powder
Rosemary (or Italian seasoning)
Sea salt

In a medium saucepan, fill 1/4 full with water. Place veggies  in colander and place colander on saucepan. Bring water to a boil. If you can place some kind of lid over the vegetables, your wait time will be reduced greatly. You want the veggies to be thawed and slightly softened. Empty water out of saucepan (or grab a frying pan, I just don't like extra dishes), add 1-2 tablespoons olive oil and pour veggies into pan. Add desired amount of spices (I didn't measure anything, I just started tossing spices in). Heat through to desired firmness.

December 22, 2013

Christmassy Traditions

Growing up, one of my favorite Christmas traditions was watching White Christmas with my dad, and eating his "Chicken in the Oven." It was our Sunday night thing. In honor of that magnificent tradition, I share with you an altered, dairy-free version of one of my favorite meals.


Ingredients:
1 package boneless chicken breast, thawed
2 Tbsp. vegan butter
3 Tbsp. all-purpose flour
1/2 cup chicken broth
1/2 cup soy milk
chicken bouillon packet (optional)
salt and pepper to taste

Preheat oven to 400 degrees. Place chicken in 9"x13" baking dish, set aside. In a saucepan, melt butter over medium-low heat. Stir in flour; keep stirring until smooth and bubbly. Remove from heat, add broth and milk slowly; stirring constantly to keep smooth. Return to heat (this is where I added the bouillon packet) and bring to a gentle boil. Stir constantly until mixture thickens. Pour over chicken and bake 30-45 minutes.

I should also mention, I changed up my mashed potato routine too. A while back, I read that if you use chicken broth instead of milk, it makes all the difference. Oh my gosh, guys, it really does make a difference! I boiled 4 cubed potatoes, like usual, drained, added a couple tablespoons of vegan butter (Cole is really loving mashed potatoes right now!), and added the broth, voila! I'm not sure on the amount, if I had to guess, I probably added about 1/2-3/4 cup broth. I usually don't like left over mashed potatoes, but these did not disappoint!

It wouldn't be Chicken in the Oven, without a side of green beans! Mmmmm! I hope you guys give this recipe a shot, it really is quick and easy! If you don't want to make your own cream of chicken, you can always buy a can; in a bowl, whisk it together with a can of water and then add it to the chicken. Next time, I think I'll double my cream of chicken recipe, so I have a little more gravy.

December 1, 2013

A Dairy-Free Thanksgiving!

As I mentioned in my last post, Cole and I celebrated Thanksgiving with a dairy-free feast. I was a little nervous, but also very excited to try the recipes I spent a few hours looking for. I read in a magazine article that a majority of people serve their Thanksgiving meal family-style, around the table. I stopped and thought about it, and realized I've never done that in my life. I have a huge family and we've always served supper buffet-style. After I read the article I thought about serving our feast family-style, but then decided against it. I didn't want to take all the dishes to my table, just to turn around and bring them all back, that seemed silly. As I was preparing our food, I realized I had no choice but to serve family-style, my kitchen is so small, I have practically no counter space, so family-style it is! Even better, I served everything in a storage container; less dishes, and less clean up. This is a nice way to go every once in a while.

For the third year in a row, I have failed to take a picture of my turkey (before being carved). Why can I never remember?! Maybe I'll do a turkey for Christmas this year and put hundreds of sticky notes all over my kitchen to remind me to take a picture of my turkey. Anyway, my turkey is a combination of two recipes; I use the seasonings from a McCormick recipe I found a while back and bag my turkey (my dad's method) to keep it from drying out.

Thanksgiving Turkey:
2 Tbsp. poultry seasoning
1 Tbsp. paprika
1 Tbsp. Lawry's
2 tsp. garlic powder
1 tsp. ground black pepper
3/4 tsp. nutmeg
1 whole turkey (the McCormick recipe calls for a 12-14 pound bird, I used the same amount for an 8 pound bird-I'm a wild one, I know!)
1 large onion, cut into wedges
6 bay leaves

Preheat oven to 325 degrees. Mix first 6 ingredients in a small bowl. Rinse turkey and pat dry with paper towels. Sprinkle roughly half of seasoning mixture inside turkey. Stuff with onion and bay leaves. Spread remaining seasoning over entire surface, and under skin of turkey. Place turkey inside oven bag, breast-side up. Add 1/2 cup of water, broth, or beer inside the bag and tie bag. Be sure to tuck the sides in. Roast until internal temperature reaches 165 degrees. My 8 pound turkey took about 2 1/2 hours. Remove the turkey from the oven and let stand 20 minutes before carving. Good luck carving, there's a reason Josh always does that part, I'm awful at it!

Mashed Potatoes:
For my mashed potatoes, I went about the process the same way I always do, but instead of milk, I used soy milk and instead of butter I used Earth Balance (it's a vegan butter). Simple and surprisingly tasty.

Green Bean Casserole:
I've only ever made green bean casserole using cream of mushroom soup, so I needed a recipe for homemade cream of mushroom soup and Naomi's recipe worked out great and included the recipe for the casserole as well. Cole loves green beans, but the french fried onions were probably his favorite part of this dish. It tasted just like a regular old green bean casserole, so we didn't feel like we were missing out on anything!

For the cream of mushroom soup:
8 oz. mushrooms, minced
2 Tbsp. Earth Balance Buttery Spread
1 tsp. onion powder
1 tsp. salt
pepper to taste
3 Tbsp. flour
3/4 cup stock
3/4 cup soy milk
salt and pepper to taste

For the casserole:
1/8 tsp. pepper
2 cans green beans, drained
french fried onions

To make the soup, melt EB in skillet, and add mushrooms, onion powder, salt, and pepper. Cook until mushrooms begin to soften, stirring often (5-6 minutes on medium heat). Stir in flour and cook 1 minute. Add stock, bring to simmer. Add soy milk, and simmer until sauce thickens (10-15 minutes).

Mix soup, pepper, green beans, and 2/3 cup french fried onions together and place in 8"x8" casserole. Bake at 350 degrees for 25 minutes (I baked mine for 30 because I prepared it earlier in the morning). Remove from oven, sprinkle additional french fried onions on top and bake 5 more minutes.

Gravy:
Luckily, my turkey came with a gravy packet, so I didn't put much thought into it. I just followed the directions and it was some of the best gravy I have ever tasted!

Cranberry Sauce:
I've only ever done cranberry jelly (you know, from the can). This year, I wanted to try and make my own. Thanks again to McCormick for such a great and easy recipe. By far, this was Cole's favorite dish. This is a great one to make the night before, since it's served cold. It also creates such a wonderful aroma while it's cooking. Your house will thank you.

1 cup sugar
1 cup water
1 pkg fresh cranberries, rinsed and drained
1/2 tsp. ground cinnamon
1/2 tsp. vanilla extract

Mix sugar and water in medium saucepan. Bring to boil on medium-high heat. Add cranberries, and cinnamon; return to boil. Reduce heat to medium-low; simmer 10 minutes or until cranberries burst and sauce begins to thicken; stirring occasionally. Remove from heat. Stir in vanilla. Cool to room temperature. Cover. Refrigerate until ready to serve.

Pumpkin Pie:
Okay, I won't lie, I didn't make a pumpkin pie. I never do. Josh and I attempted to make pumpkin pie one year and it went horribly wrong, so I stick with store-bought. The pie I bought wasn't dairy-free, but Cole didn't seem to show an interest in it anyway, so I didn't count it as part of the dairy-free aspect. Is that cheating? Well, it'll be our little secret.

That was my Thanksgiving feast. How do you serve your Thanksgiving supper?! Are you a buffet-style or family-style?

November 22, 2013

Beans and Weenies

Did your mom and dad make this for you when you were little?! This was one of my favorites growing up. Such a simple, easy dish, yum. Because of Cole's food allergies, we're already a tad limited in what we can give him, the trouble falls on his pickiness. My child is not a meat eater. For a while there, he would eat chicken nuggets, but that didn't last. I decided to give this classic a try, thinking maybe I could trick him into eating the meat. I cut it up so that there were only tiny pieces of hotdog and lots of beans. He ate maybe three bites before he was wise to me. Shucks. Oh well, I'll try again another time. I liked it...

Ingredients:
1 can baked beans
2-3 hotdogs

While heating baked beans in a saucepan on medium heat, slice hotdogs and the quarter the slices. Combine with baked beans and cook until heated through. Easy peasy!

November 1, 2013

Pumpkin Soup


While I was in Omaha, my family had a soup cook-off. I wanted to try something different, but I also wanted something my son would be able to eat (dairy-free). I liked the way it turned out, it may not be for everyone, but it works for our family. I may not have won, but the two votes I did get were both from children, so if you want something to please your kids, this is the soup to try. Someone told me that pumpkin soup is better served cold, I served it warm and it tasted good to me, but next time I'll give it a shot!

Ingredients:
  • 1 T. olive oil
  • 1 cup finely chopped onion
  • 1 clove garlic, finely chopped
  • 1 medium-sized leek, white parts only, chopped (this video helped me quite a bit since I'd never worked with leeks before)
  • 1 cup chopped apple
  • 3 T. sugar
  • ¾ t. ground cinnamon
  • ½ t. ground ginger
  • ¼ t. ground nutmeg
  • ½ t. salt, plus more to taste
  • 1 15-ounce can low-sodium vegetable broth
  • 2 cups water
  • 2 15-ounce cans pumpkin puree
  • 1 cup coconut or soy milk
  • Pepper, to taste
  • Cayenne, for garnishing
 Directions:
1. In a medium-large stock pot (3-5 quarts), heat the olive oil over medium-high heat. Add the onion and garlic, and cook for 3-4 minutes, or until the onion is translucent.
2. Add the leek, apple, sugar, spices and salt, and cook for 1-2 minutes, stirring constantly, until the leek is softened.
3. Add the vegetable broth and water. Bring the mixture to a boil and then turn down to a simmer for about 15-20 minutes, or until the apple pieces are tender.
4. Stir in the pumpkin puree (next time I'll use 3 cans of pumpkin instead of 2).
5. Working in batches, puree the mixture in a blender until smooth, adding a bit of the coconut/soy milk to each batch until all has been added.With a normal sized blender, I was able to puree everything in two batches.
6. Return the soup to the pot and heat over low heat, stirring constantly, to desired temperature. Add salt and pepper to taste. Garnish with a sprinkle of cayenne pepper and fresh herbs or your choice.
Slightly adapted from About.com

Cole loves his cousin Sara!


September 13, 2013

Photo Friday

Day 7: Texture. These are the stairs leading up to my house.
Day 8: Bright. It's been so chilly in our house, I finally had to bust out the tie blanket Josh and I made a few years back. I love how gaudy it is.
Day 9: Your choice. I found some fall coloring sheets online and my son was more interested in chewing on his new crayons. He also broke one, and my heart broke a little with it...
Day 10: Reading. I've been reading The Adventures of Sherlock Holmes recently. It's a collection of several Holmes stories, I'm currently reading A Case of Identity. My goal is to share my thoughts of the whole series instead of story-by-story. So far I really like it though! I also got it for free on my Kindle app., can't beat that!
Day 11: Eyes. It seems like Nessa Rose doesn't make too many appearances on my blog anymore, that needs to change and fast! I think she has the most beautiful eyes a pup can have. I love her to pieces! She likes the tie blanket being out more than I do!
Day 12: On my plate. We had pot roast. I love how easy and simple it is! 
2-3 pound chuck roast
red potatoes cut into large pieces
one onion cut into large pieces
carrots
beef broth
Throw the meat into your crock, followed by the veggies, and broth. Season with garlic powder, onion powder, sea salt, and pepper. Place the lid on the crock and cook on high 5-6 hours or until meat is tender and falls apart with a fork. See, easy!
Day 13: Polka dots. I had kind of been wondering what I was going to do for this one, and then magically I receive a box in the mail with this amazing wrap dress that is polka dotted with tiny little flowers. Problem solved!

July 25, 2013

Pepperoni Pizza Muffins


To say my husband likes pizza is an understatement. Josh could easily eat pizza everyday and have no problem with it. We both like trying new things, so I've made it a sort of pet project of mine to find as many different forms of pizza that I can. Enter the pepperoni pizza muffin. This has already become my favorite non-pizza pizza dish I've found so far. It's so simple and quick AND filling, which we appreciate.

Ingredients:
3 cups biscuit/baking mix
1 can pizza sauce
3/4 cup water
1 cup shredded mozzarella cheese
1/2 cup diced or mini pepperoni
1 teaspoon Italian seasoning

Combine ingredients, mixing until moistened. Fill greased muffin cups* (not quite to the top). Bake at 350 degrees for 17-20 minutes, or until toothpick comes out clean. Let cool for 5 minutes. Serve warm. Enjoy!

See how easy this is?! If you like a lot of sauce, you can use a second can of pizza sauce for dipping (I'd heat it up though).

*I use silicon muffin cups, and still use a muffin pan for the sake of simplicity.

Recipe adapted from Allrecipes iPhone app. I tried finding it online but wasn't successful.

May 7, 2013

Baked Chicken Chimichangas

Saturday, Josh and I spent some quality time watching Star Wars episode IV. We also went bowling because Josh got some new bowling shoes that he was wanting to try out (they were a belated birthday gift from my folks). While we were at the bowling alley I got a new ball...again. I had been bowling with a ball that was too light for me and therefore cracked. I now have a proper ball! We went bowling again Sunday so I could try out my new ball (we were done bowling by the time my ball was ready on Saturday).
Since Sunday was Cinco de Mayo, we decided to make baked chimichangas. I wasn't sure how they would come out. These chimi's didn't disappoint, and they aren't spicy or fried-double perk in my book. I'm a huge wimp when it comes to spicy food. You can toss some salsa on top to give it a little zip if that's your preference.

When Josh and I cook something, the length of time it takes to make is just as important as how it comes out. If it takes too long to prepare or cook (or both) and it's merely okay, it'll probably get labeled as a one time wonder. This is a supper we will repeat again, no doubt. This recipe took us less than 30 minutes to make and assemble...you can't beat that!


Baked Chicken Chimichangas
8oz pkg. cream cheese, softened
8oz. pepper jack cheese, shredded
1 packet taco seasoning
1 lb. cooked chicken
8 flour tortillas, warmed (I microwaved them about 15 seconds)
Olive Oil

Preheat oven to 350 degrees. Heat about a tablespoon of oil in a skillet. Coarsely chop up the chicken (it makes it a little easier to crumble) and add to the skillet. Using a potato masher (it really works-thanks Rachael Ray) or spring for a Mix 'N Chop from Pampered Chef. Mash, chop, crumble or what have you, until your chicken is cooked. In a medium bowl, mix together cream cheese, pepper jack cheese, and taco seasoning. Divide cheese and taco seasoning mixture evenly among the tortilla shells. Tuck in the sides, and roll up each tortilla. Lay seam side down in a greased 9"x13" baking dish. Brush on additional olive oil to the tops. Bake for 15 minutes, flip, bake another 15 minutes. Served naked or with cheddar cheese, green onions, sour cream, and salsa. Enjoy!

May 2, 2013

Spinach and Ricotta Stuffed Shells

I love spinach. My husband, on the other hand, keeps his distance. Imagine my shock and excitement when we were discussing our menu for the next couple weeks and he suggested trying this recipe. Whoa. Josh has a knack for picking out recipes we'll both love, so it's fun when he wants to try something outside his comfort zone.

This is a dish we'll be repeating again in the future. It's not difficult at all and it's super tasty. My favorite part of this recipe was the actual preparation stage. Usually when we make supper, one of us is in the kitchen, and one of us hangs out with the babe. Not this time. Cole was content with hanging out in his playard, so we got to work. We chatted about our day, Cole's birthday party, Doctor Who, etc. It was relaxing and a nice change of pace. I really hope we get to cook together again soon!


Ingredients:
18 jumbo pasta shells (about 6 ounces)
1 1/2 teaspoons olive oil
1/4 medium onion, finely chopped
1-15 ounce can crushed tomatoes
3/4 teaspoon sugar
1/4 teaspoon salt plus additional for seasoning
1/4 teaspoon freshly ground black pepper plus additional for seasoning
Olive oil or cooking spray
2 cups baby spinach, finely chopped
1 cup low-fat ricotta
1/2 cup shredded part-skim mozzarella
1 egg, lightly beaten

Cook the shells like normal, drain, and set aside. Meanwhile, heat oil in large saucepan over medium heat. Add onion (and if you're using it, chorizo as well) cook until onions are translucent (or chorizo is browned). Add tomatoes and sugar and season with salt and pepper to taste; simmer about 10 minutes. Set aside. Preheat oven to 375 degrees and coat an 8x8-inch baking dish with cooking spray. In a large bowl, combine spinach, cheeses, egg and 1/4 teaspoon each salt and pepper. Spread half the tomato sauce into prepared dish. Spoon spinach mixture into baggie, cut one of the bottom corners off and pipe a heaping tablespoonful into shells. Arrange stuffed shells in baking dish. Pour remaining sauce over shells and cover with aluminum foil. Bake 30 minutes or until pasta is cooked through and sauce begins to bubble. Let rest 5 to 10 minutes before serving.

March 24, 2013

Oven Hamburgers

Last week Josh and I attempted cooking hamburgers on the stove. It was not a successful attempt. We had wanted to pull out our grill and have a cookout but the weather had other ideas. That was a night we each ended up doing our own thing for supper. We had hamburger patties that still needed to be enjoyed properly, so I searched good ole Google and came across this site. Since we already had hamburger patties, I didn't need the recipe. I did, however, use the method and it came out amazing!


Whether you use store-bought hamburger patties or make your own, you really have to give this a try! The hamburgers have so much flavor, they barely shrink down, and it takes no time at all. If you're a grill enthusiast that believes hamburgers should only be prepared using charcoal or gas, consider this: the entire cooking process took less than 20 minutes. I'm not saying we'll never cook out on our grill again, I promise we will. On those nights when you need a quick meal, or the weather doesn't agree with your plans and you had your heart set on hamburgers, you can still have them! Win-win.

Instructions:
Preheat oven to 475. Line a baking sheet with aluminum foil, and spread a thin layer of salt on the foil to absorb the drippings. Arrange hamburger patties on wire rack (this makes all the difference). You'll want the rack to sit about 3/4" above the baking sheet.
Roast the burgers for 15-20 minutes. If you're adding cheese, the Amateur Gourmet suggests taking the burgers out when they have about 2 degrees left to cook, add the cheese and return to the oven for another minute. Once you've transferred the burgers to buns you are done! See how easy that was?!

March 19, 2013

I'm a fink and I'm sorry

Things got a little crazy yesterday, so I was unable to post about our happy holiday like I had planned.

I had mentioned in my last post, my corned beef was a success. I decided not to do cabbage this year, I really have to be in the mood for it. Did I mention I'm the only one that had it? Josh isn't a corned beef kinda guy, and Cole called it an early night so he didn't get a chance to try a little piece. Hopefully when I have my leftovers Cole will be awake to give it a little try.

Josh surprised me with a St. Patrick's day gift and gave me a Nexus 7, and I'm already obsessed with it! I can see why he loves his tablet so much. A good portion of my tablet's memory is being put to good use, with oodles of books I will hopefully be going through in a jiffy.

 My last hair cut was probably March...of last year. I could say I don't have the time, and it wouldn't be that far-fetched, but it wouldn't be that honest either. Getting my hair cut makes me anxious. There have only been a handful of times that I have actually liked my hair cut. I just couldn't put it off any longer. As many of my fellow mommies (maybe even daddies) know, long hair and babies just don't mix. I had about 7 inches chopped off and I couldn't be happier! What do you think?!

Sorry about the terrible quality, these were taken on my phone.
As to why I didn't keep my promise (sorry again!), I usually do my blogging during the day when Cole is taking a nap. Yesterday I had an appointment to get my hair cut. When Cole and I got home, I noticed it was a little cold in our house, and as it turns out the gas company didn't refill the tank (for the second month in a row). So in trying to figure out all of that, and dealing with a cranky, cold baby, my afternoon filled up.

Corned Beef (Minus the Cabbage)
1 corned beef brisket (flat cut is best), about 3 pounds
seasoning packet
water or beer

Rinse the brisket before cooking. Place fat side up in dutch oven fill with about 3/4" water. Sprinkle seasoning packet over brisket. Cover and bake at 325 degrees for about 3 hours or until tender. Internal temperature should be around 160 degrees. Let cool 15 minutes before slicing.  Easy peasy.


February 15, 2013

Pizza Patties

When Josh and I celebrated our second Valentine's Day together, I wanted to make him a great dinner, but my cooking skills were limited to toast, cereal, noodles, and canned biscuits (hey, I was only 18). I knew Josh loved pizza but I wanted to find something a little fancier. I combed through my mom cookbooks (we didn't have internet, crazy right?!), and I found the perfect dinner.

I made him a pizza patty, but I didn't make it well. I knew Josh had a tendency of getting heartburn, so I set a tiny ice cream bowl filled with Tums next to his plate. It was a good thing I did, this thing was heartburn central. Oh. Man. My first real cooking experience and it was a major dud. To this day, I still get teased about how awful it was.

This year, as I was planning our big dinner, I found myself perusing through old cookbooks (we have internet, but every once in a while it's nice to see what old cookbooks have to offer), and I came across that recipe. It was fate.

I think Josh was a little nervous to try it again, and if I'm totally honest with myself, I was too. Looking at this recipe, it couldn't be simpler, which only makes my first attempt that much more pathetic. I'm happy to say, this was the cooking redemption I was seeking.


Ingredients:
1 pound bulk Italian sausage
1/2 cup minced onion
1/4 cup minced garlic
1/4 cup grated Parmesan cheese
2 cups spaghetti sauce
4 sandwich buns, split (I highly recommend onion rolls)
1/2 cup shredded mozzarella cheese

In a bowl, combine the sausage, onion, garlic, and Parmesan cheese. Shape into 4 patties. In a skillet, cook patties over medium heat for 15 minutes or until the meat is no longer pink, turning occasionally; drain. Add spaghetti sauce; cover and simmer for 7 minutes. Heat the onion rolls in the oven at 130°F for 10 minutes. Once you've added the patty to the bun sprinkle with mozzarella cheese.

Now that you know just how easy this is to make, it's even funnier that I was able to mess it up so bad. Do you have a meal that needs redemption? No better time than the present to give it a shot! 

July 21, 2012

Shrimp Po'Boys

See I can keep up my end of the deal! I had a few reasons for choosing this recipe: First, we had shrimp on the barbie a couple weeks ago and had left over frozen shrimp that I wanted to use. Second, I had a promise to keep and I'm holding up my end of things. Finally (and most importantly) I've been missing Biloxi lately; I miss the beach, and the sun and the day trips to New Orleans remember this and this? The latter of the two trips, I was introduced to the po'boy. It was divine. Hope you enjoy it too!


Ingredients:
vegetable or peanut oil, for frying
1 egg
1 cup milk
1-1 1/2 lb shrimp, deveined
salt
1/2 cup flour
1 cup bread crumbs or cornmeal
2 tablespoons seafood seasoning (I used Lowry's seasoning because I didn't have seafood seasoning and it was pretty tasty)
soft rolls, split (cheese rolls pictured above)
mayo or miracle whip, optional
tomato, optional
lettuce, optional

Directions:
  1. Preheat 1-inch of oil in deep skillet over medium heat
  2. Beat egg and milk together. Pull tails off. Salt shrimp, then soak in the milk bath. 
  3. Combine flour, bread crumbs, and seasoning in a wide bowl or on a plate. Using tongs, remove a few shrimp at a time and coat in breading.
  4. Add breaded shrimp to the hot oil and fry until firm and golden all over.
  5. Make up your sandwich using your favorite toppings, serve and enjoy!
For my sandwich I kept it simple, I was using things I already had in the cupboard making my sandwich a true po'boy! Happy cooking!

July 19, 2012

Meatloaf Muffins

I'm OBSESSED with Rachel Ray. I know some people aren't too crazy about her, but I like her enthusiasm and her recipes are just plain nifty.

I came across this recipe a while back when Josh and I first got here and didn't have any of our stuff because we were still living in a hotel. I was watching RR and thought this was the neatest recipe, wrote it down, stuck it in a book I had with me, and only recently found said recipe. It's almost like finding money in my pocket...well it's like that to me anyway.


When it comes to meatloaf, I like it simple. I think a good meatloaf shouldn't need any "extra" help, and I especially hate when there is ketchup involved. Basically, I took Rachel's idea of putting the meatloaf in a muffin tin, and used my parent's recipe.

Ingredients:
1 lb ground beef/turkey
1 egg
splash of milk
handful of crackers (I used roughly half a sleeve of Ritz crackers)
salt and pepper

Directions:
  1. Preheat oven to 450 degrees. In a small bowl, beat together the egg and milk, add to the larger bowl holding the ground beef. 
  2. Get ready to get your hands dirty! Mash together everything slowly adding crackers until everything is sticking together nicely. 
  3. Brush muffin tin with olive oil. Take a small chunk of meat and push it into the tin until evenly distributed.
  4. Bake for 20 minutes. Cut open one of the muffins to check that it's been thoroughly cooked. I served this with mashed potatoes. Enjoy!

March 25, 2012

Josh's Pulled Pork

I finally, FINALLY got some pulled pork, this is a good day. My husband is the greatest, he really is. So, excuse me for a moment while I brag on him. Not only did he make the most amazing tasting pulled pork I've ever had the pleasure of tasting; last night he made penne marinara for me while I was Skyping with my parents so I could continue to visit, isn't he sweet?! It was tasty penne, but his pulled pork was out of this world! What a dreamboat, right?

We found a recipe for pulled pork that seemed simple enough and Josh followed pretty much none of it and flew off the cuff, he's a brave man. He even predicted the right kind of BBQ sauce for us, it was on the sweeter side, and it was delish.

Ingredients:
2 pounds boneless pork loin
1 cup water
dash of Lowry's seasoning
Sweet Baby Ray's original BBQ sauce

Directions:
In a dutch oven, place pork loin and water, sprinkle Lowry's over pork. Bake at 350ยบ covered for an hour, take it out and flip it sprinkle with Lowry's again, cover and continue to bake for another hour. When the hour is up, pull it out and shred the pork to your preferred consistency. Add as much or as little BBQ sauce as you like and bake for another 40 minutes covered. Serve on buns, or just grab a fork. You won't be disappointed!

February 21, 2012

Rosemary Roasted Chicken with Red Potatoes

INGREDIENTS:
6 chicken breast fillets (boneless and skinless)*
1 1/2 lbs. small red potatoes, cut into 1-inch cubes
2 tsp. paprika
1 1/2 tsp. crushed rosemary leaves
1 tsp. minced garlic
1/2 tsp. coarse ground black pepper
2 tbsp. olive oil
1 tsp. salt (optional)**


DIRECTIONS:
1. Mix oil, all of the spices and salt in large bowl. Add chicken and potatoes; toss to coat well. 
2. Arrange chicken and potatoes in single layer on foil-lined 15x10x1-inch baking pan sprayed with no-stick cooking spray.
3. Roast, uncovered, in preheated 425°F oven 30 minutes or until chicken is cooked through and potatoes are tender, turning potatoes occasionally.


*The recipe calls for 6 bone-in chicken thighs, skin removed. Our commissary only had boneless, skinless chicken breast fillets when we went shopping and we liked it A LOT!
**I'm sure the salt would've been great, but I forgot to add it-oops! I did salt it a little afterward though, and it was de-lish!


This McCormick recipe is already pretty easy, but they made it even easier by making a packet you can buy with all of the spices! Gotta love that! Josh and  I can't wait to have it again!

February 14, 2012

Valentine's Pizza

Happy Valentine's Day! 


This year Josh and I wanted to keep it simple for our first Valentine's Day abroad, and what better way then with some homemade pizza?! Well, semi-homemade anyway! 


INGREDIENTS:
1 Pillsbury pizza crust
1 bottle Ragu pizza sauce
Mozzarella cheese
Mini pepperoni (because they just look cute!)


DIRECTIONS:
1. Preheat oven to 375°F 
2. Roll out the dough, I actually had to use a rolling pin for this, it made it easier for the next step
3. You can go with the traditional pizza circle if you want but why not celebrate the holiday of love with a heart-shaped pie?! The key here is patience!
4. Add your chosen amount of pizza sauce, cheese and pepperoni
5. Bake 17-20 minutes or until golden brown
6. Enjoy with your Valentine!